3 posts tagged with "kernels"

View All Tags

Persistent Storage and Datasets

· 4 min read
Eléonore Charles
Product Manager
Frédéric Collonval
Chief Technical Officer ad interim

When working with Remote Kernels, one of the key pain points for users has been the lack of persistent data storage. Previously, every time you initiated a new kernel session, you would lose access to your previous data, forcing you to download datasets repeatedly for each new session. This not only wasted valuable time but also made the workflow cumbersome.

Persistent User Storage

The good news? We've introduced a solution that completely eliminates this problem! Now, you can persist data on the kernel side, meaning your data is saved even when your kernel is terminated. No more re-downloading files for every new kernel – your data is always available, just like it would be in your home folder on your own machine.

This is a massive time-saver and enhances productivity, allowing you to focus on what really matters: building models, analyzing data, and running experiments without constantly managing your data files.

A Smoother User Experience

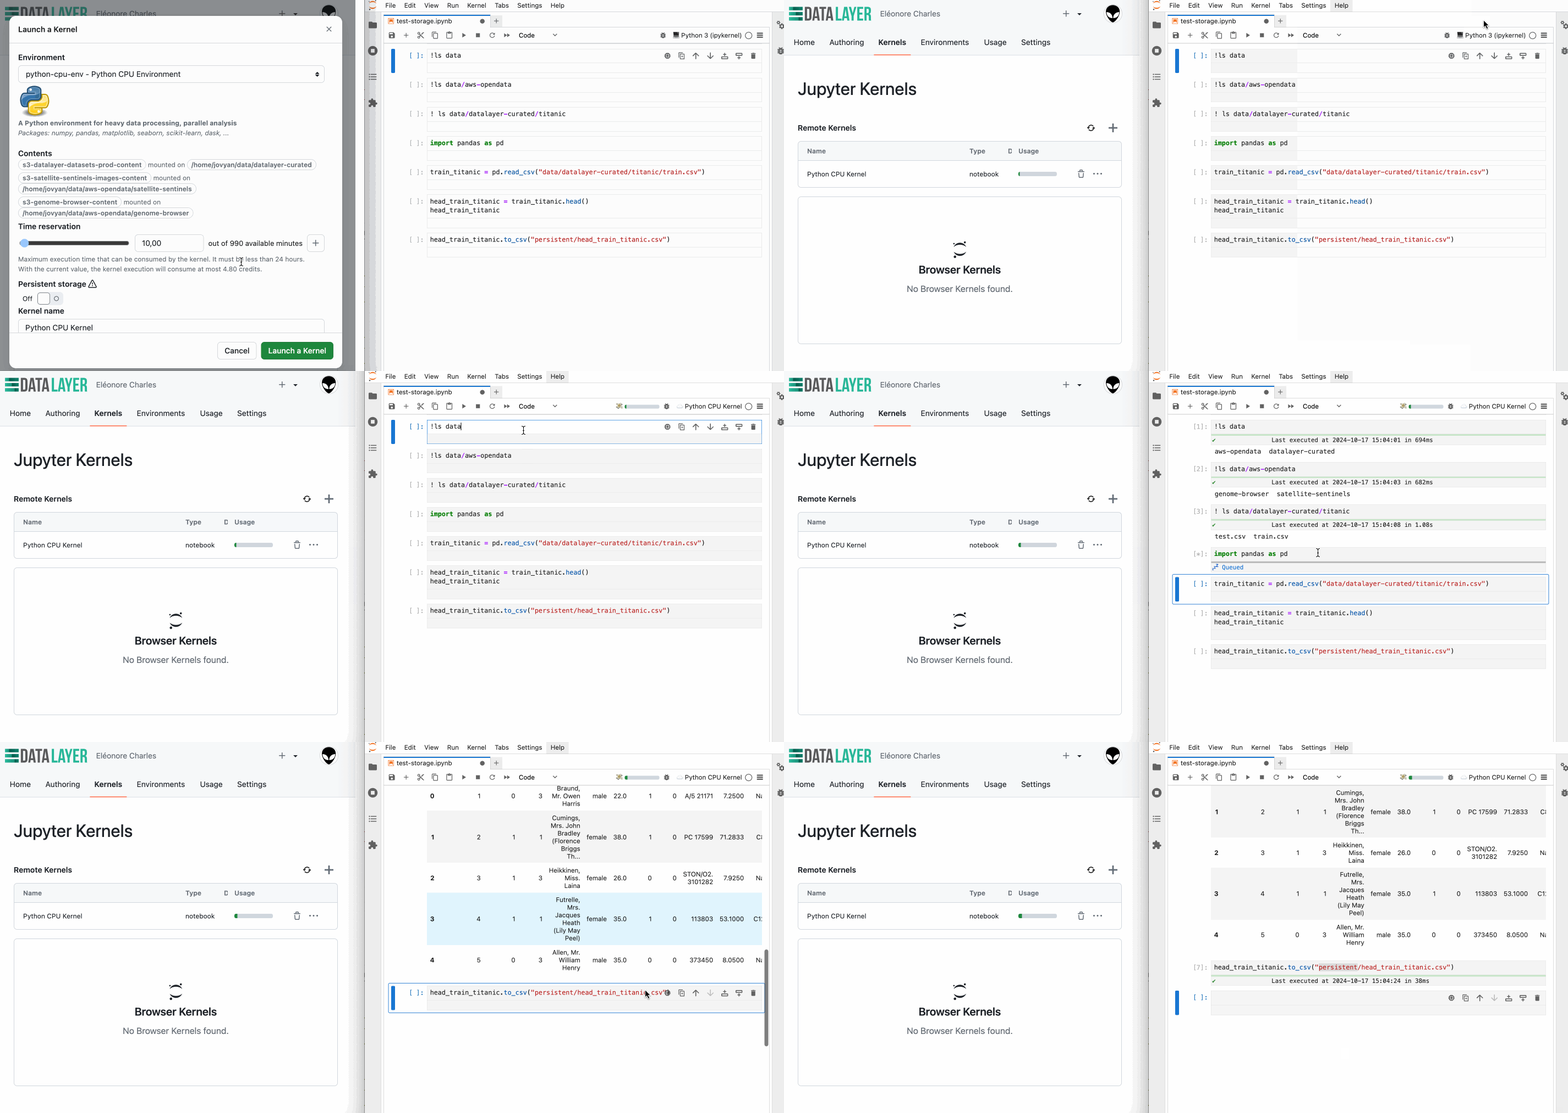
So, what does this look like in practice? When launching a new kernel, you have the option to enable persistent storage. Once enabled, the system automatically mounts a persistent storage in the persistent directory. This directory is accessible across different kernel sessions, ensuring that your data remains intact and available anytime you need it.
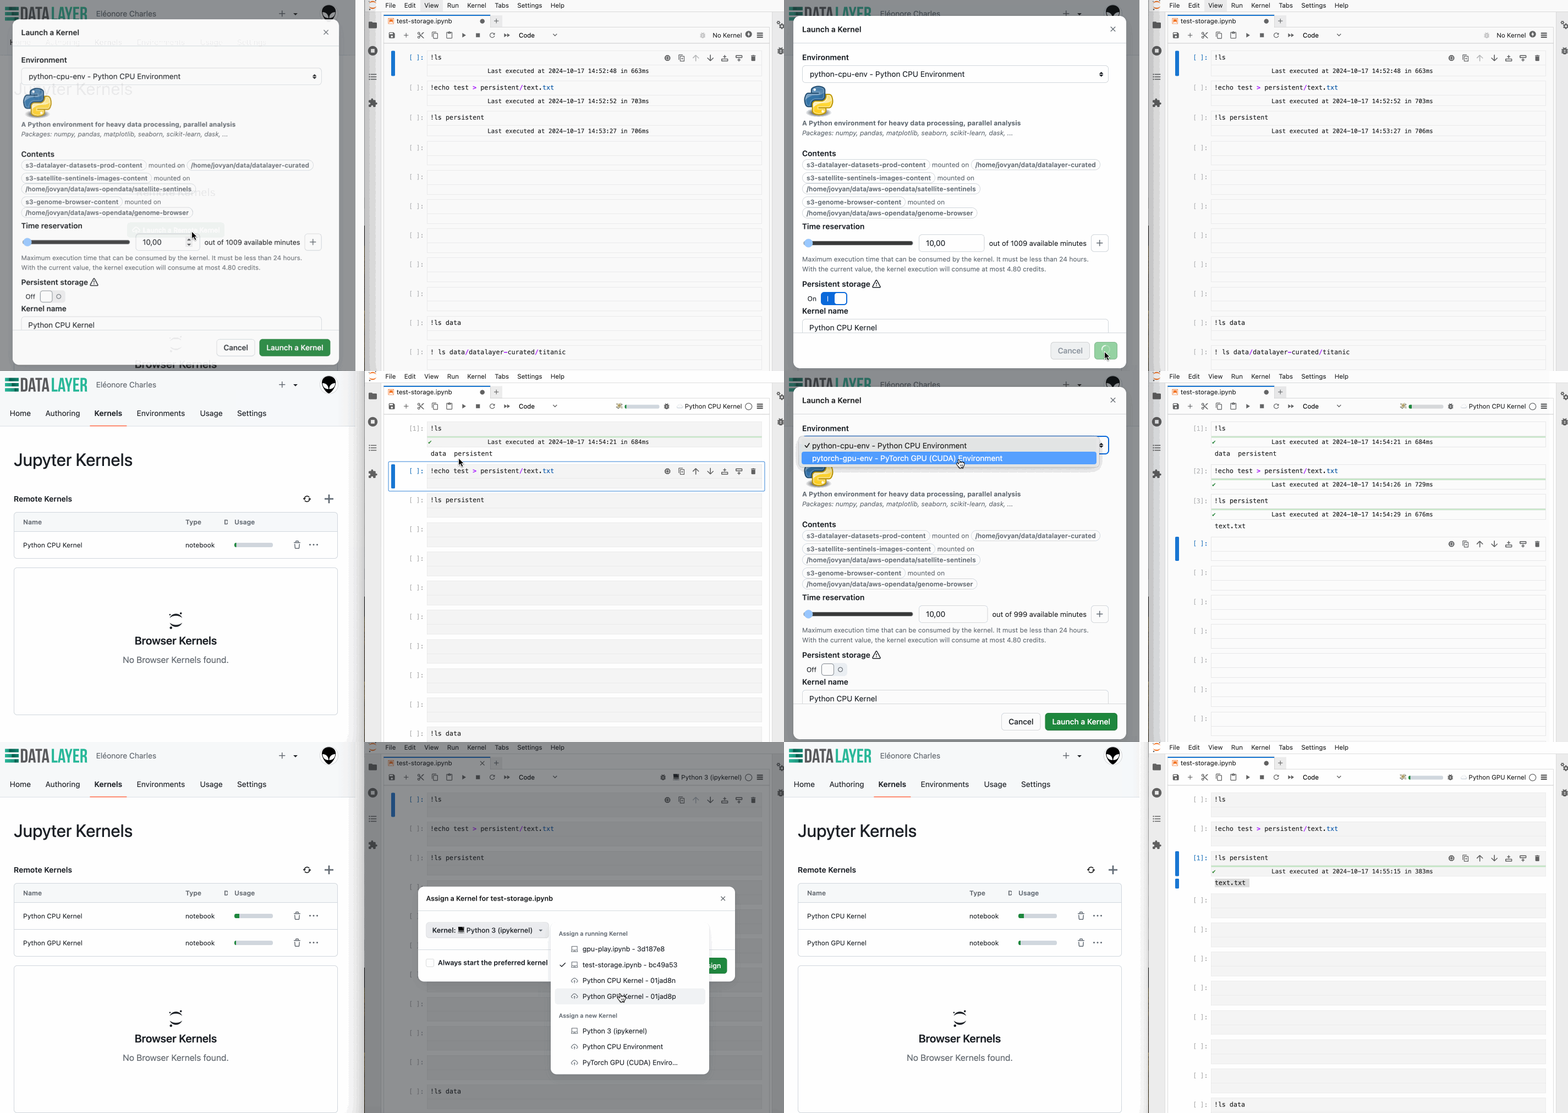
While enabling persistent storage slightly increase the kernel start time, the convenience of having your data ready across sessions might far outweighs this.

note

If you were using Datalayer with JupyterLab or CLI, you can upgrade the extension to get this feature available using the following command: pip install datalayer --upgrade

How Does It Work Under the Hood?

Building reliable, persistent storage for cloud environments requires robust infrastructure. To achieve this, we've implemented the Ceph storage solution. Ceph is a highly scalable and reliable storage system commonly used by top cloud providers like OVHcloud. It is designed to handle large volumes of data while ensuring high availability, redundancy, and data protection.

To learn more about how we have implemented a Ceph storage in our platform, check out our technical documentation: Ceph Service and User Persistent Storage.

Pre-Loaded Datasets

In addition to persistent storage, we've introduced a dedicated directory, data, where you can access a collection of pre-loaded datasets. This feature allows you to jump straight into your analysis without needing to upload your own data, making it easier and faster to get started.

The directory is set to read-only, so while you won't be able to write directly to it, you can effortlessly copy datasets over to your persistent storage for further modification. You'll find a range of popular datasets in the datalayer-curated subdirectory, including the classic Iris dataset, the Titanic dataset, and many more.

Several Amazon Open Data datasets are also available in the aws-opendata subdirectory, providing a wealth of data for your analysis.
What's Next?

We're not stopping here. There are several exciting enhancements on our roadmap, designed to further improve your experience:

  • Expanded Storage Capabilities: We plan to increase storage limits, allowing you to store even more data.
  • Storage Browsing: A new feature that will allow you to browse your kernel's content directly within JupyterLab and Datalayer platform.
  • Storage Management: You'll soon be able to view and manage your storage directly from JupyerLab and Datalayer platform (delete, move, rename files with a user interface instead of using terminal command).
  • Sharing Content Between Users: We are working on a feature that will enable you to share persistent data with other users, facilitating collaboration on projects.

Stay tuned for these upcoming features, as they will further enhance your ability to analyse data efficiently with Remote Kernels!

Refer to our documentation for more information on how to get started with persistent storage and pre-loaded datasets.

Datalayer: Accelerated and Trusted JupyterRegister and get free credits

Datalayer Private Beta

· 3 min read
Eléonore Charles
Product Manager

We are super excited to announce that Datalayer is entering Private Beta! After months of development, we are inviting today those who signed up on our waiting list to experience our solution first-hand.

How to Join the Beta?

If you registered on our waiting list, keep an eye on your inbox, invitations are being sent out now! We're thrilled to have you onboard as part of this exclusive group, helping us shape the future of Datalayer.

But don't worry if you haven't signed up yet—there are still limited spots available. Simply register on the waiting list to secure your spot in the private beta.

Why Join the Beta?

This is your opportunity to get early access to the cutting-edge features of Datalayer, and we need your help to make it even better. Your experience and feedback will be invaluable in helping us fine-tune the product, optimize performance, and add features that truly meet your needs. It would be great to have you on board and we can't wait to hear your thoughts!

As a beta user, you'll enjoy:

  • Free credits to try out Remote Kernels.
  • Direct support from our team to ensure a smooth experience.
  • Directly influence the future development of Datalayer through your feedback.

What Can Datalayer Bring You?

Datalayer simplifies access to powerful computing resources (GPU or CPU) for data scientists and AI engineers. Whether you're training models or running large-scale simulations, you can seamlessly scale your workflows without changing your code or setup.

Key Benefits

  • Effortless Remote Kernel Access: Seamlessly connect to high-performance Remote Kernels from JupyterLab, VS Code, or via the CLI. Switch kernels with just a few clicks to run your code on powerful machines, without altering your workflow or setup.
  • Flexible and Simple Setup: Avoid the complexity of configuration changes or workflow disruption. Launch Remote Kernels effortlessly and scale your data science or AI workflows with ease, whether you're working on notebooks or scripts.
  • Optimized Resource Usage: Gain control over resource allocation by running specific notebook cells on Remote Kernels only when needed. This precision helps minimize resource consumption and maximize efficiency.
  • Flexible Credits-Based Model: Enjoy a pay-as-you-go credits system that adapts to your needs. With transparent usage tracking and detailed reports, you'll only pay for the resources you use, making it a cost-effective solution for scaling your projects.

Learn more about Datalayer's features on our user documentation and online SaaS.

Datalayer: Accelerated and Trusted JupyterRegister and get free credits

Remote Kernels Preview

· 4 min read
Eric Charles
Datalayer Founder
info

First things first, what is a Jupyter Kernel?

A Jupyter Kernel is the place where the computation of your Jupyter Notebook is happening. A Kernel is separated from the Notebook, hence can run your code remotely on a different system.

Install Datalayer

Datalayer is a JupyterLab extension. To install it, just run the following command in your terminal.

pip install datalayer

You will need python>=3.9 and pip available on your machine.

info

Remote Kernels is being released in a PREVIEW mode. This means that the account you will create will not stay and can be removed at any time based on Datalayer's new releases.

JupyterLab Launcher

Launch JupyterLab as usual.

jupyter lab

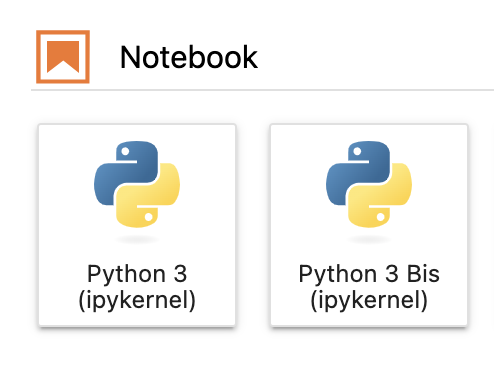
JupyterLab users are used to go the their launcher which present typical tiles to create a Notebook and launch a Kernel.

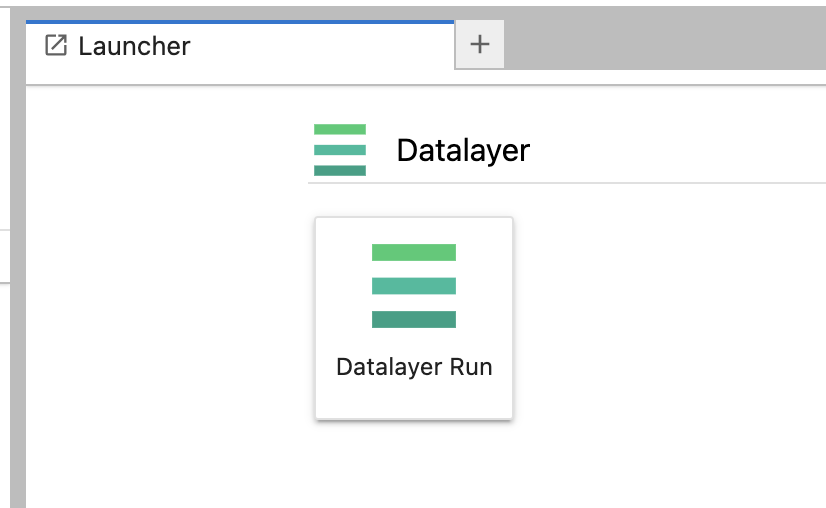
Datalayer introduces a new element at the top of the JupyterLab launcher.

Account

The first step is to authenticate.

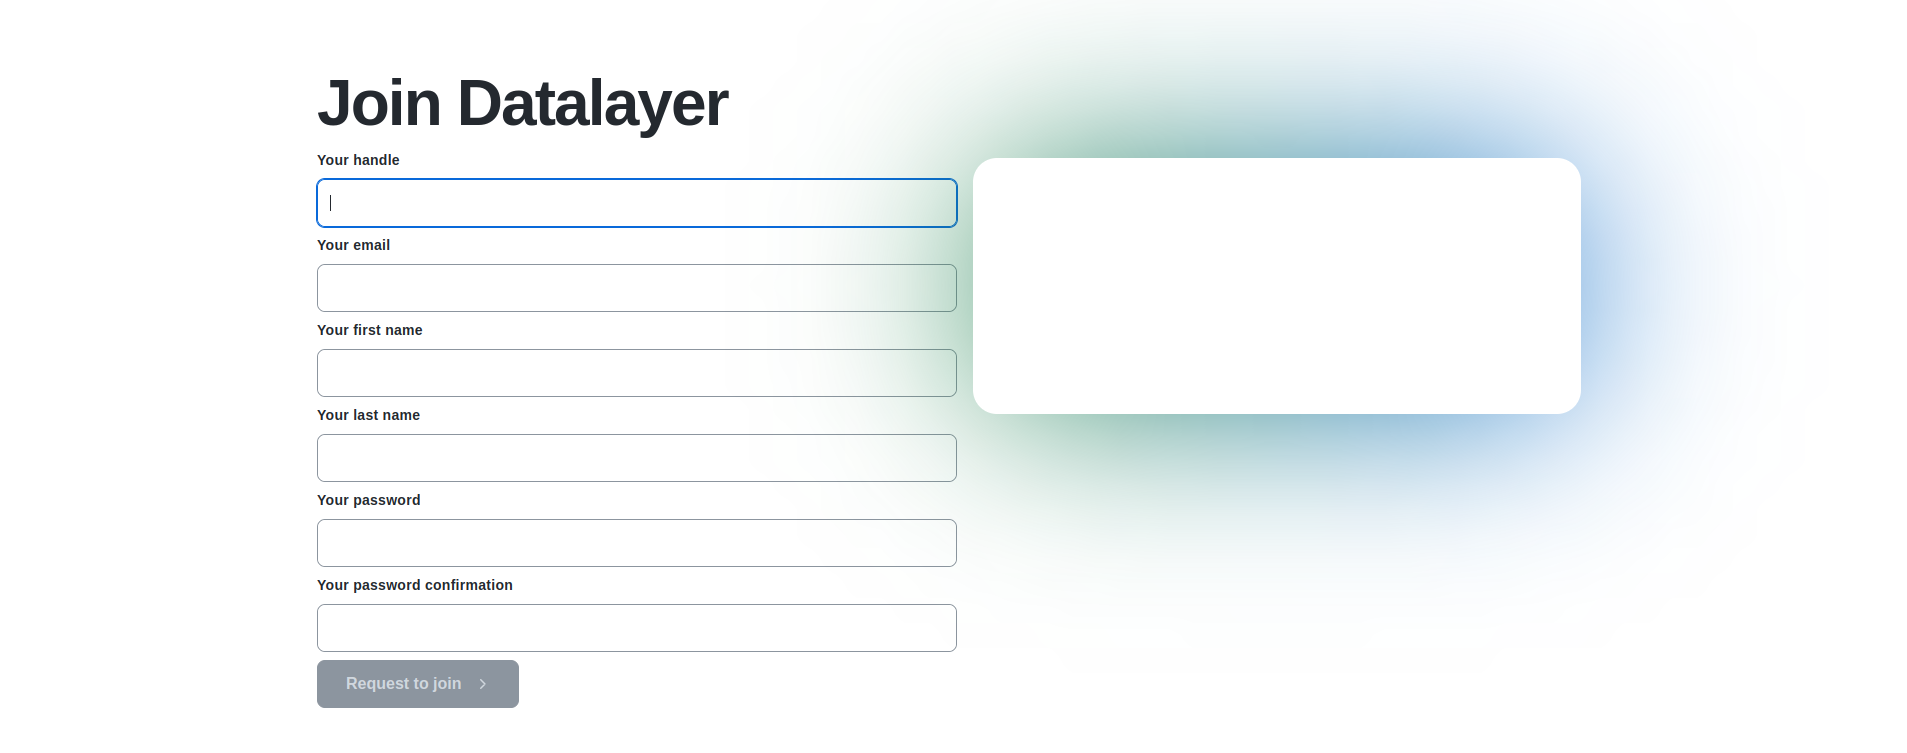
If this is your fist contact with Datalayer, you will need an account. Just fill in a few details and check your mailbox for the confirmation code.

Serverless

Once authenticated, Datalayer takes care of the rest and will create the needed services for you in its own infrastructure.

You don't have to worry on anything, just wait on the green light that should appear on your Home page.

Kernels

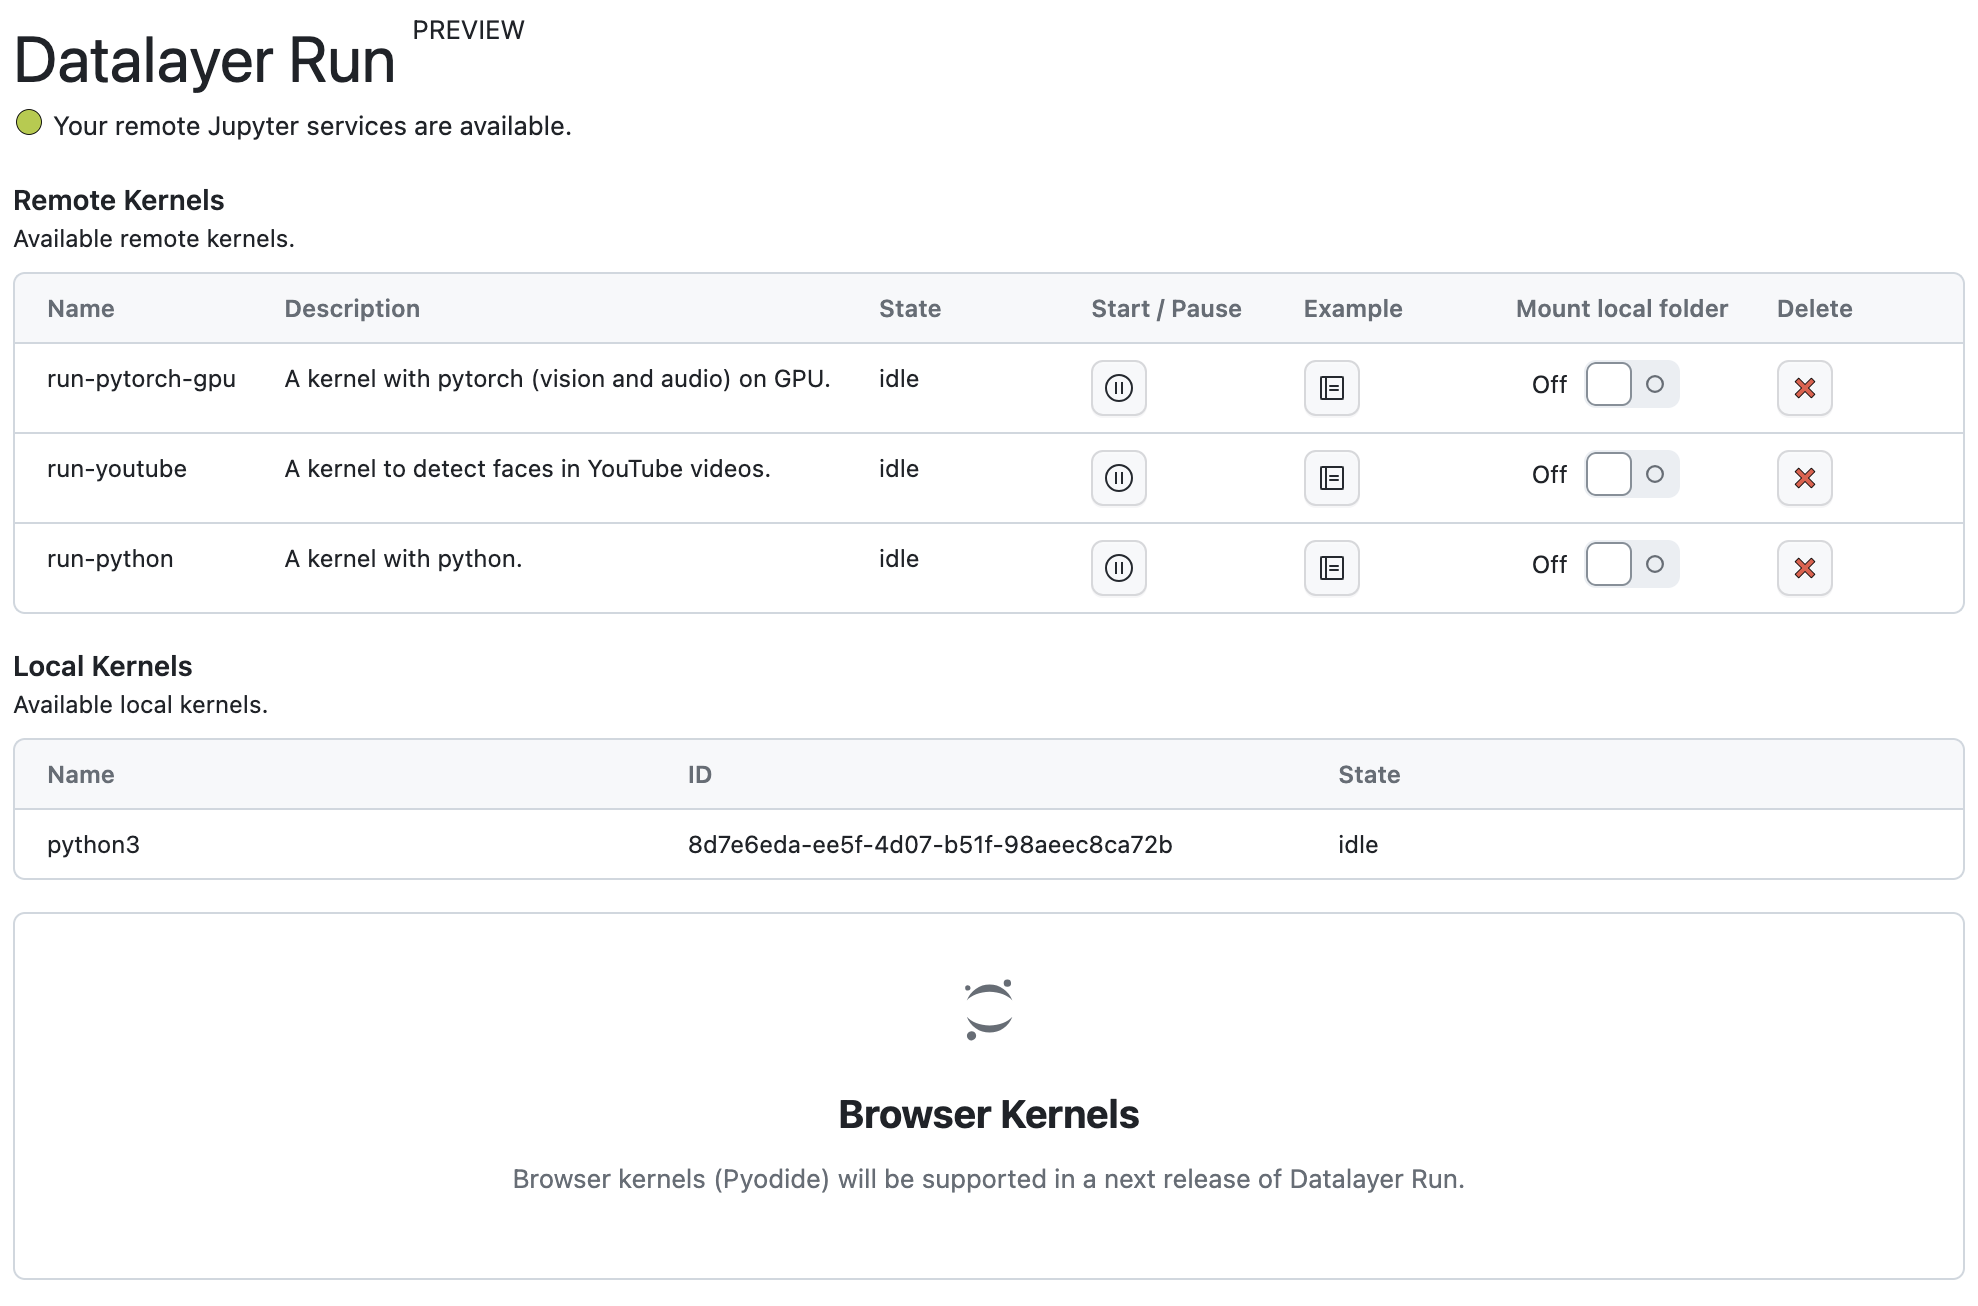
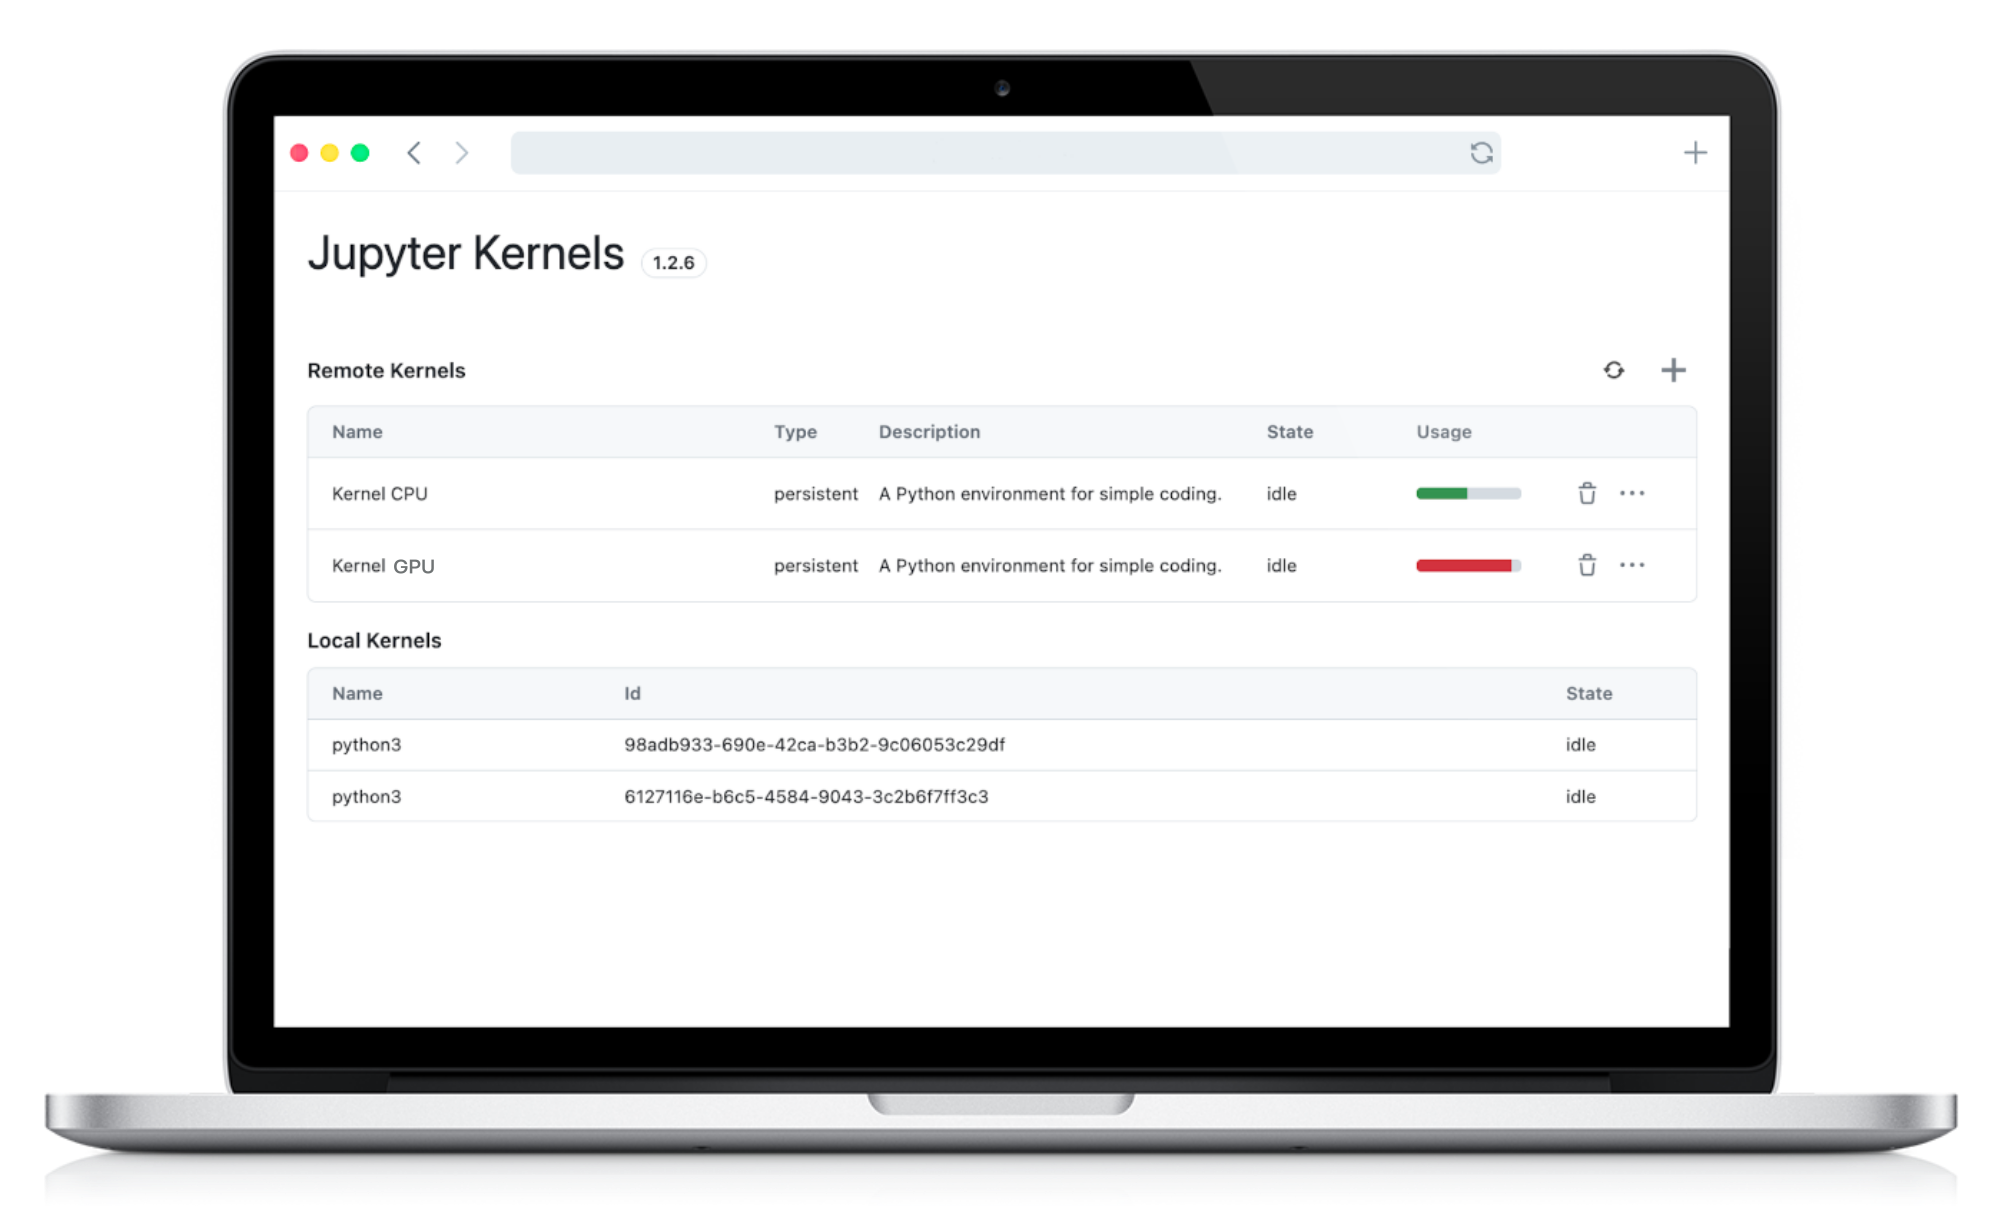
Once the services are available, it may take a bit of time to have your kernels up-and-running. For now, we offer you 3 differents Remote Kernels.

The Home page also list your local machine Kernels, and will offer in next releases the ability to create local browser Kernels.

Remote Kernels

Remote Kernels creates for now predefined Remote Kernels from your local JupyterLab.

Notebooks

To ease the onboarding, you can create example of Notebooks clicking on the Example buttons.

This step is of course completely optional and you are welcome to directly use your own Notebooks.

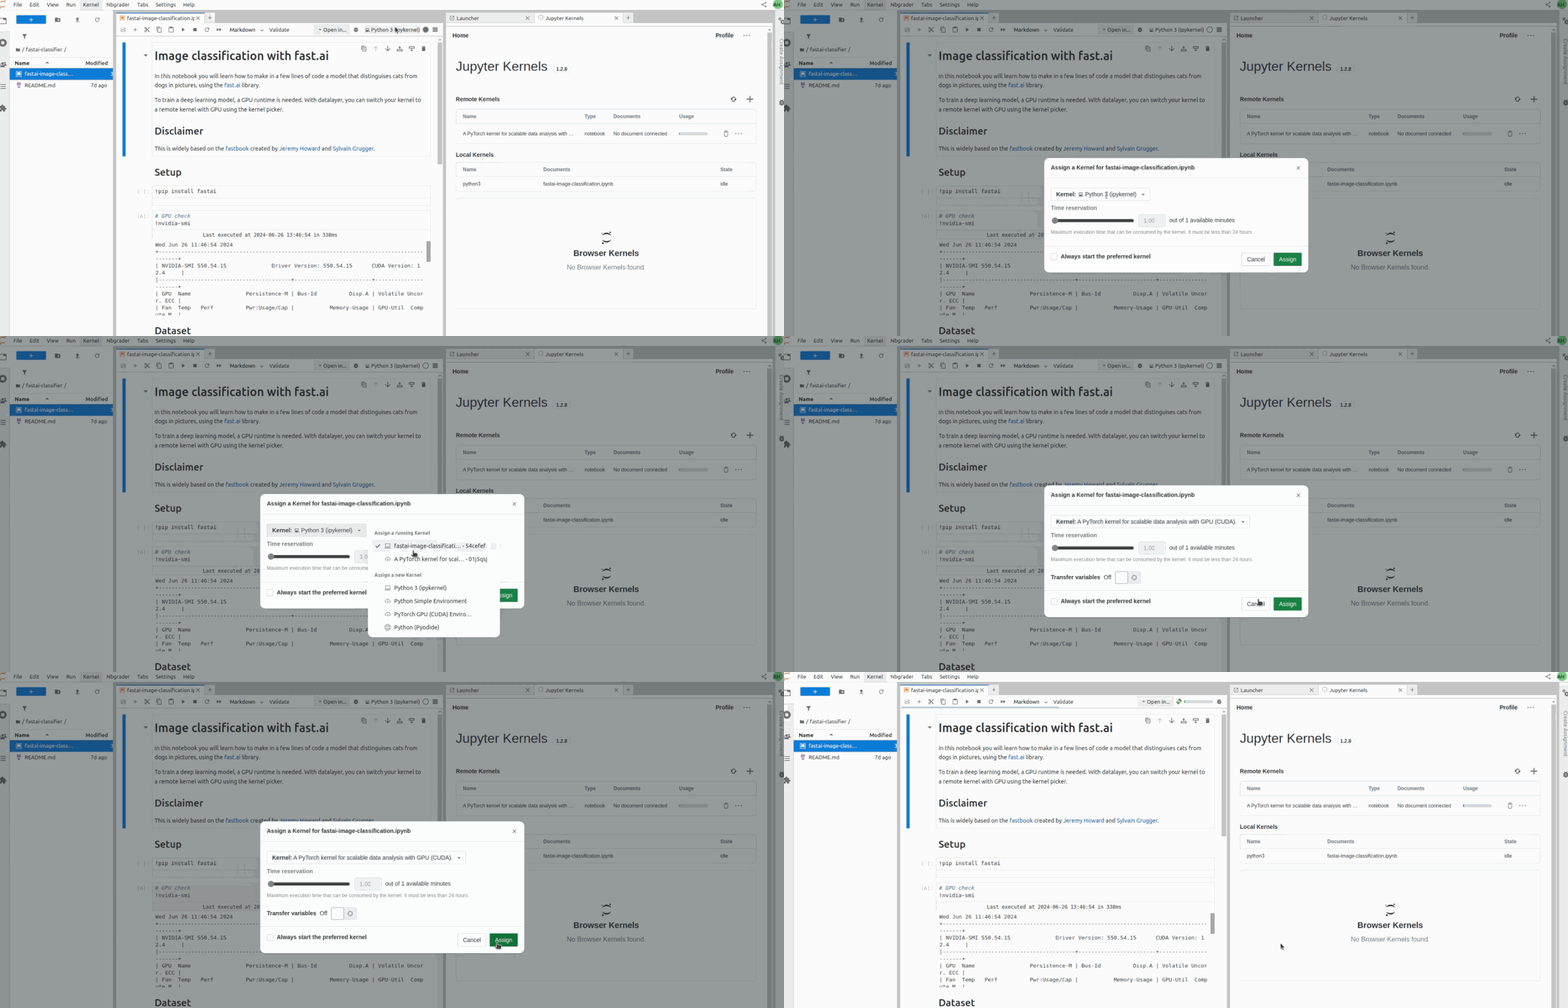
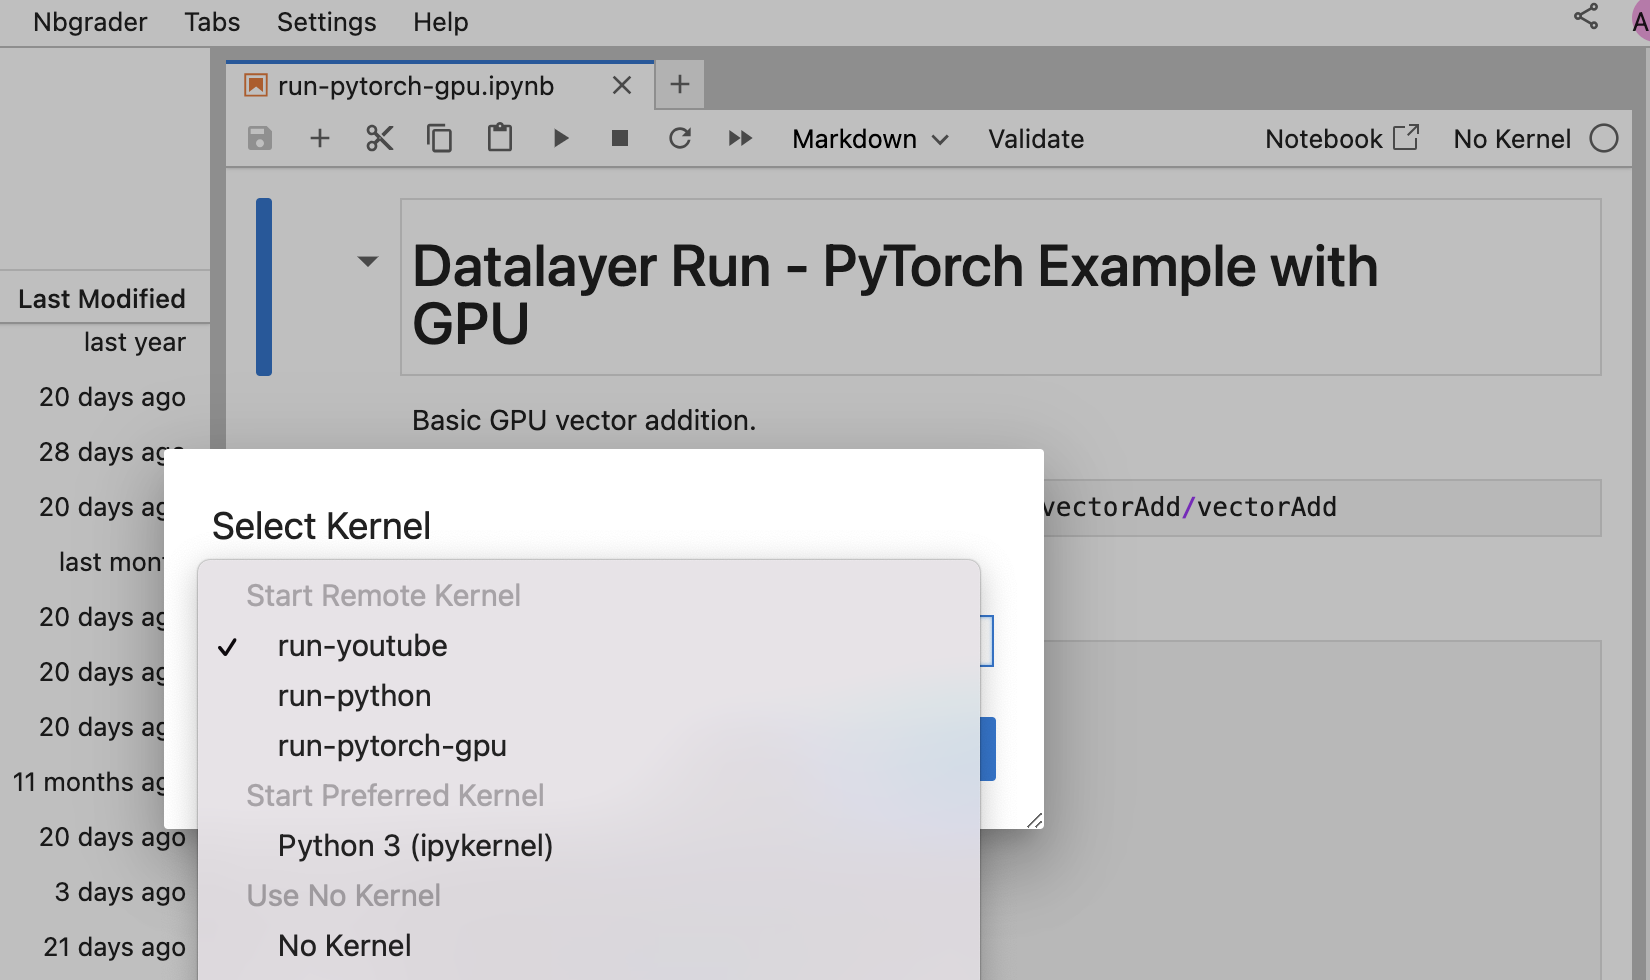
You can use the Kernels from the standard JupyterLab kernel picker.

Click on the top-right picker of the Notebook, and assign a Kernel to Notebook (the Remote Kernels are listed at the top).

Local Files

info

The Local Files access feature is highly experimental.

  • You need a local SSH Server.
  • Once a folder is mounted, you'd better restart your server to unmount it (we are working on a better implementation).
  • Windows is not supported for now.
  • ssh from you local machine on your user account has to work without prompt

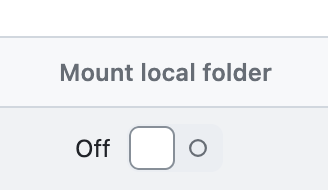
To mount your Local Files to the Remote Kernel, a SSH Server must be running on your local machine (on port 22) and you must be able to connect without password prompt from your local terminal.

# Has to connect without password prompt.
ssh localhost
# ...

Kernel Lifecycle

You can delete a Kernel.

We will support the start as pause of the Kernel.

note

Kernel start and pause is not supported in the current release.

Need Help?

Contact us for support, we are here to help.

Datalayer: Accelerated and Trusted JupyterRegister and get free credits